Some Processing with User Defined Arrays
| User Defined Arrays.
I have been unable to find anything about higher dimensional arrays in
JavaScript so I am restricting this discussion to user defined
one-dimensional arrays. Working with user defined arrays is
essentially the same as working with built-in arrays. The two
major differences have to do with initially defining them and initially
assigning values to the elements of the array. We will work two
different examples, one where the array is defined and initialized all
at once and the other where it is initialized after it has been defined.
Strobing Colors. Our first example doesn't work as nicely as I would like, but it gives us something to improve on in later chapters. The code simply sets up an array of colors and then loops through the array to change the background color of the page when the user clicks on a button. You should copy the following code and put it in a file called StrobeColor.html. |
| <html> <head> <title>Strobe Colors</title> <script language="JavaScript"> function StrobeIt() { var rainbow_colors= new Array("red", "orange", "yellow", "green", "blue", "indigo", "violet"); for (var i = 1; i <=10; i++) {
} } |
| When this is uploaded you should get something like the following before you click on the command button. |

| Once you click on the button the page should have a
strange variation in color ending in solid violet. I have nested
the color changes in a double loop to make sure it goes through the
array of colors more than once.
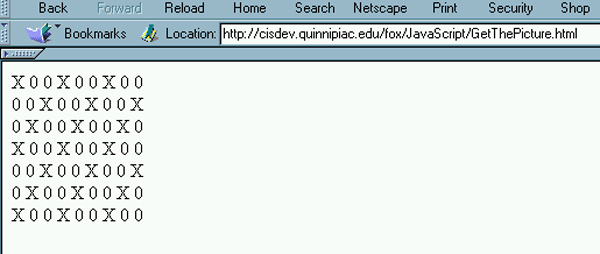
Get the Picture. The next example also works with a one-dimensional array. The elements are filled in based on some modulo arithmetic. That is, if the remainder of the index divided by three is equal to one then the array element gets an "X". Otherwise it gets a "0". Then the array is printed out in a block rather than in a row. You should call the file GetThePicture.html. |
| <html> <head> <title>Print the Picture</title> <script language="JavaScript"> function printArray( ) { var picture_array = new Array(); // filling in the array for (var i = 1; i <=63; i++) {
}
} |
| After uploading the page and clicking on the command button you should see something like the following array. Remember, we are using creative printing to display a one-dimensional array as a two-dimensional array. |
