Start Using FrontPage 2000
|
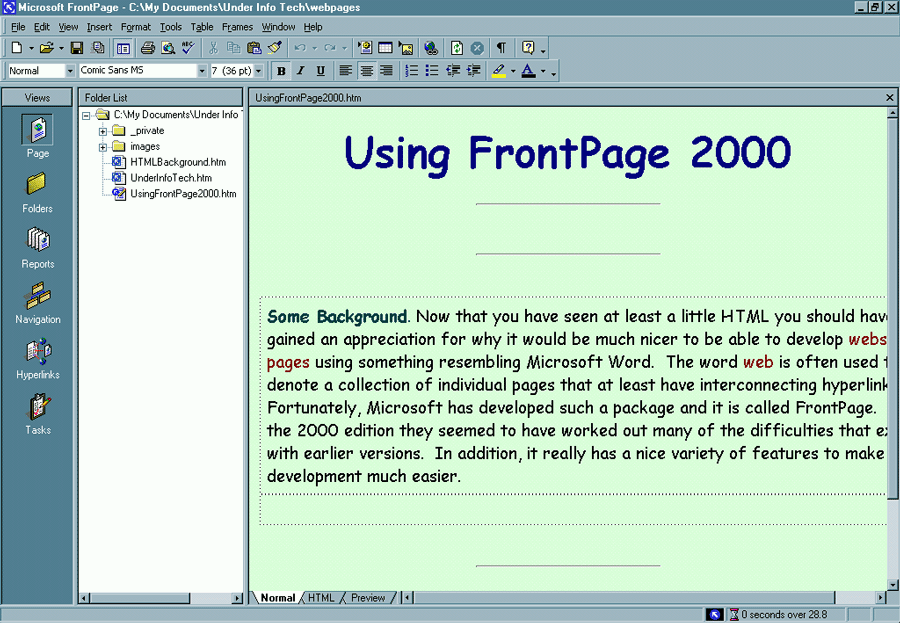
Some Background. You can probably imagine why it would be nice to be able to develop webs and pages using something resembling Microsoft Word. The word web is often used to denote a collection of individual pages that at least have interconnecting hyperlinks. For example, you are currently looking at the UsingFrontPage2000.htm page in the Web Development web. The web contains all of the relevant pages and images used for teaching this course. Fortunately, Microsoft has developed such a package and it is called FrontPage. With the 2000 edition they seemed to have worked out many of the difficulties that existed with earlier versions. In addition, it really has a nice variety of features to make web development much easier. The following is an image of the development environment for FrontPage 2000. |

|
The FrontPage Development Environment. By looking at the .gif image you should be able to see the menus and windows that are typically displayed in FrontPage. The Views bar/window on the left can be used to work with the current web in a variety of ways. Each of the icons will put you into a different view of the web. The following table gives you a quick overview of the purpose of each icon. |
| Icon | Description |
| Page | This view allows the user to develop an individual webpage in a manner that is analogous to developing documents in Word. |
| Folders | This view gives much more detailed information about the files and folders in the current web. |
| Reports | This page gives a summary of a large
variety of the attributes and features of the current web such as
|
| Navigation | This view helps you see the overall structure of the linkages between pages and their levels relative to each other. This page is also useful for determining page titles. |
| Hyperlinks | When you have selected a particular file, clicking on this icon will give you a view of all of the hyperlinks to and from this file. |
| Tasks | This is a page that helps you manage the tasks involved in developing and maintaining this web. |
|
The Folder List. The folder list is lists the directories and subdirectories associated with a particular web. FrontPage likes to have all of your webs located in the My Webs directory in the My Documents folder. When you create a new web it is usually placed further along this path in another folder/subdirectory. You will notice in the image above there are two subdirectories with names _private and images. The _private directory is often used for information that you obtain from one of your pages that you want to keep private from all the other users. The images directory usually contains all of the images associated with the web. It is usually worthwhile to to keep these sorts of things separate in order to facilitate updating and maintenance. |
|
Starting a New Web. Each person in class should start a new web that is about themselves. You do this by
You should get a dialogue window that looks like the following. |
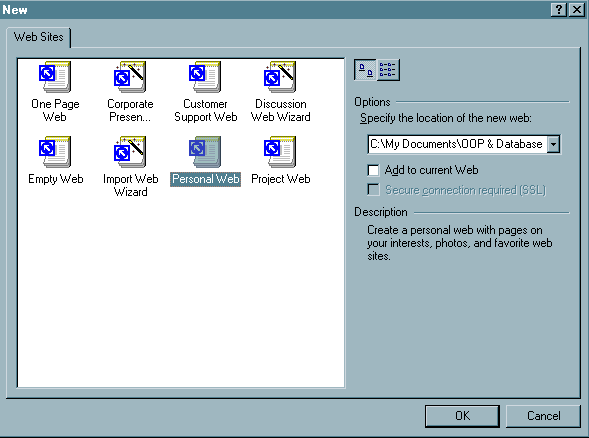
| Notice that you have several basic
templates you can choose from. Notice that you can also specify
the location of the new web by either adding it to the current web or
typing in a new path.
Since this first web will be about yourself you should click on the personal web and specify the path where you want it located. The program will take some time to develop the web, but after a little wait you should see a screen that looks like the following. |
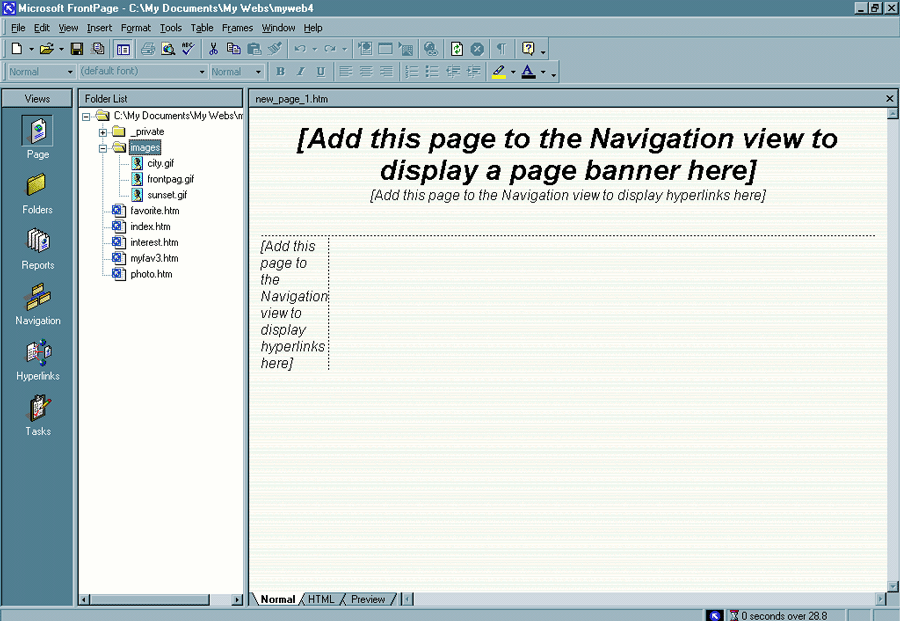
| Notice that you have a folder list
with several example folders. In addition, I have expanded the
images folder to show you that it contains three sample photos from
"your" life. All of this is done to illustrate some
typical pages and their construction. You should double click on
the index.htm entry in the folder
list. This is your homepage. To verify this you should click
on the navigation icon in the Views window. Notice how the title
is different from the name of the file. The navigation view is the
easiest place to change the title of a page.
At this point there are two major ways you are likely to proceed.
Since this is likely to be your first time using FrontPage we will make use of one of the themes that is provided. You should
You will get a dialogue window that looks like the following. If you wanted to develop your own pages to a much greater extent you would have used the background item on this Format menu. |
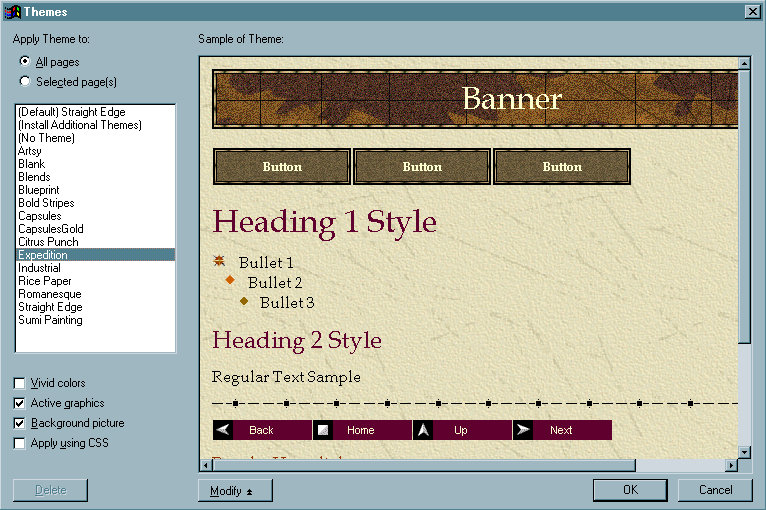
| I have selected the Expedition
theme, but you should click on different themes in order to select the
one you want.
Using these themes is a very quick way to develop a much higher quality web. It is also possible to modify these themes, but that can be done on your own time. In general, using themes makes for a more complicated web because of all the extra images used for things like banners and navigation buttons. But there is no getting around the reward of using them for the little effort they require. At this point you should click on each of the different tabs at the bottom of the page development window. This will show you the HTML and preview your page where you can try out the links. In order to navigate in the Normal or development view you need to control-click the link. Notice how photo.htm contains a couple photos. We will learn to modify these and add new photos in the next lesson. The favorite.htm page has favorite hyperlinks primarily to external webs. The interest.htm page has started a list of interests. You should start making your webpage your own by changing the interests to something you want. |
Inserting
and Modifying Hyperlinks. On the favorite.htm page you
want to start putting in some of your favorite links.
You should get a dialogue window that looks like the following. |
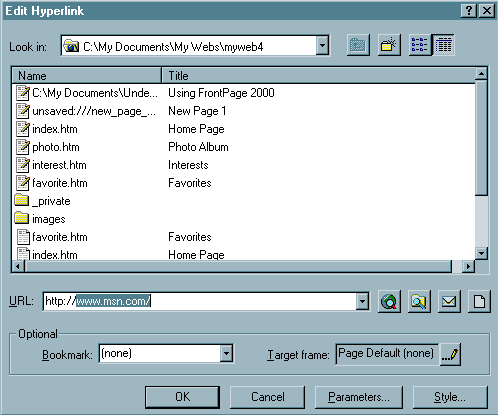
Notice that the link is currently http://www.msn.com/.
Now that you have done this you can modify or insert other links. |
| More on the Navigation
View. I want to include more on this view because it is
so important. This is the place where you determine the titles for
your pages and how you expect them to inter-relate to each other in the
web.
The Navigation View for this course web is contained in the diagram below. |
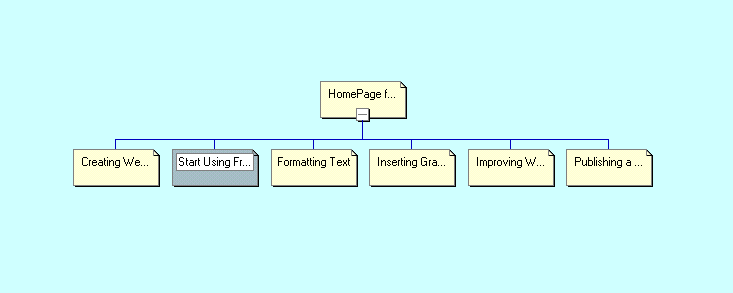
Typically, the file at the top in the hierarchy is your homepage and it is named index.htm. You can build quite elaborate relationship structures in this way. |
Inserting
Navigation Bars. Regardless of whether you are using a
theme you may want to have some sort of web navigation structure that is
consistent from page to page within the web. This can be
accomplished using the Navigation Bar
item in the Insert menu. These
bars can be located anyplace on each page in the web, but they are
usually located either on the header, strictly to one side or at the
bottom of each page.
You should get a dialogue window that looks like the following. |
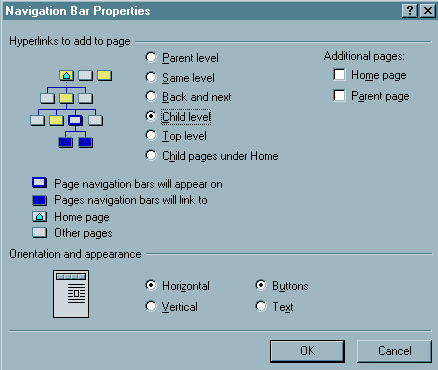
| Notice the radio/option buttons on
the left. As you select one of the options you will get an image
that represents its meaning in the diagram to the button's left.
In addition you can select items from the Additional Pages column of
check boxes. You can also modify their orientation and appearance.
The hierarchy that is used is the same structure you've been developing in the Navigation view. The titles on the links or buttons are the same as the titles used in the Navigation view. Because there are so many possible arrangements you are probably best off experimenting to see what happens with particular selections. |