Modifying the Feedback Page


Some Background.  You should remember we developed the overall structure and outline for our web using the Corporate Presence Wizard.  This gave us the basic format of several pages that we have already started to modify, though we have many more to work on.  Since the feedback page, feedback.htm, will be relatively easy to modify we will do this next.

  1. Make sure to format the background to the ACMEBack.jpg.

  2. You want to make sure you are using the Avant Garde Md BT font throughout.

Sometimes this is quite easy to change, other times it can get quite elaborate.

  • To change regular text, highlight the text and follow the typical procedure.

  • This will also work for the labels on the controls.

  • For the form input controls (comment box, text boxes, command buttons) you need to

    • Right click the control

    • Select the Form Field Properties in the popup menu

    • Click on the Style command button in the lower left of the dialog that appears.

    • Click on the Format button in the lower left corner that appears on the next dialog.

    • A menu will appear that will have the Font item at the top which you should select.

    • Now you can modify the font like you normally would.

As you can see, this is quite a labyrinth to finally get to the usual font dialog.

  1. You are likely to want to resize some of the input controls so that they are more appropriately sized.

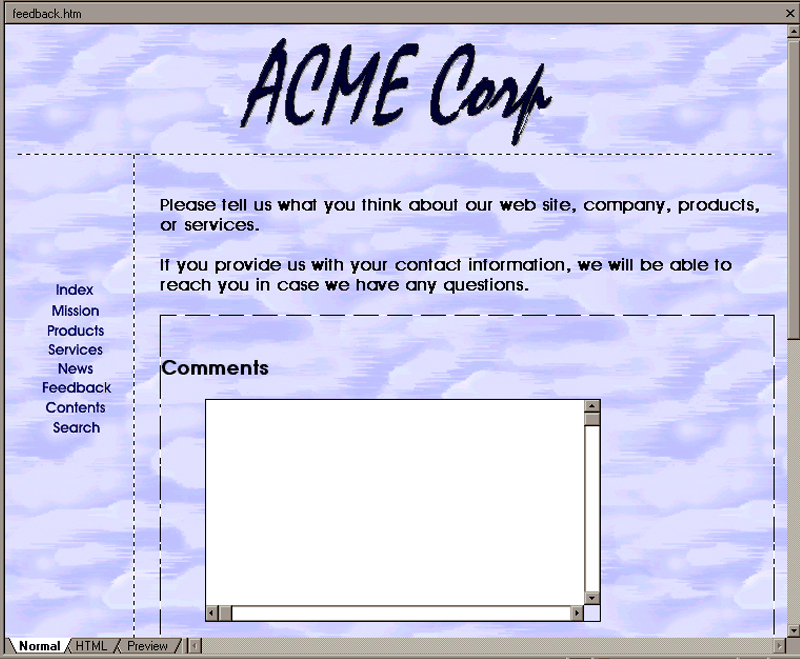
Now the page/form should look somewhat like the following.


Modifying the Category Combo Box.  Now our modifications will get more elaborate. 
  1. You need to right click the Category combo box.
  2. Select the Form Field Properties item.

This will give you a dialog like the following.


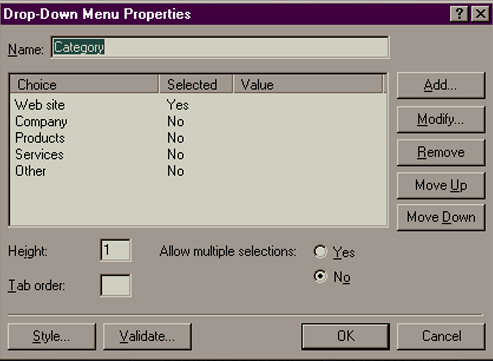
Now you can use this to modify the list that will appear in the combo box during its runtime use by using the appropriate command buttons.

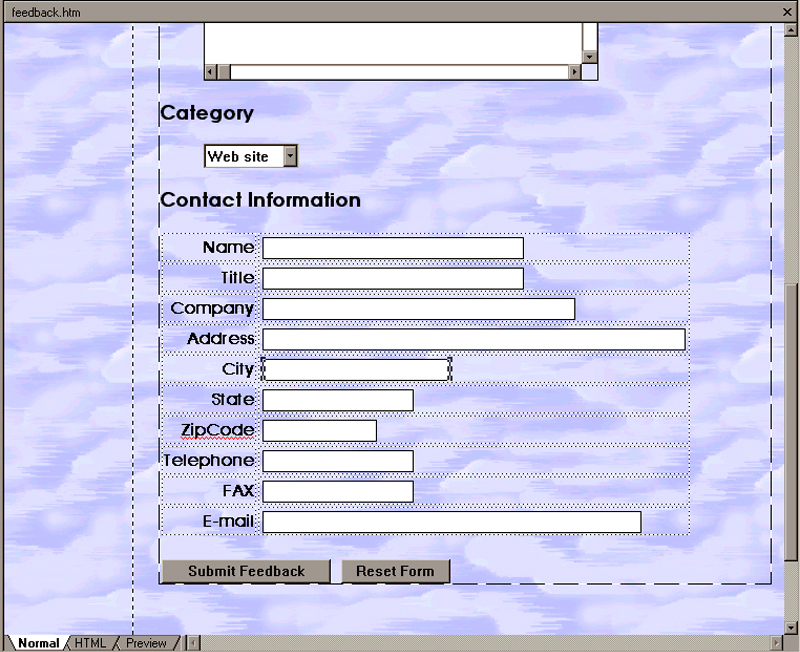
You are also likely to have to select the Height, which is almost always 1.

Adding More Controls for the Address.  Now we want to add more controls in order to get a more useful address.  What you are working towards developing is contained in the image at the bottom of this page.

  1. Select the row of the table containing the Address.
  2. Click on the Table menu.
  3. Select the Insert item.
  4. Select the Rows or Columns item in the sub-menu.
  5. Add three rows below the current row.  These will be for the City, State and Zipcode.
  6. In the left hand column, fill in the appropriate labels for
    1. City in the row just below the Address,
    2. State just below that and then
    3. ZipCode below that. 
  7. You're likely to have to format the fonts to get them to match the others.
  8. Now click in the table cell just to the right of City.
    1. Click on the Form item in the menu
    2. Select the One Line Textbox in the submenu that appears.
    3. Stretch it out so that it is long enough to contain a real name.
  9. Do the same for the State and ZipCode.
  10. Now you need to right click on each of the new controls
    1. Select the Form Field Properties
    2. Change the Name appropriately to City, State or ZipCode.

We could almost as easily put in a list/combo box for the states, but we'll leave that up to your discretion.

Now this part of the form should look something like the following.