
Working a Bit with ImageReady
|
Working With Graphics. If you have done any surfing on the web you know there are a lot of reasons for developing higher quality images in your webs. For example
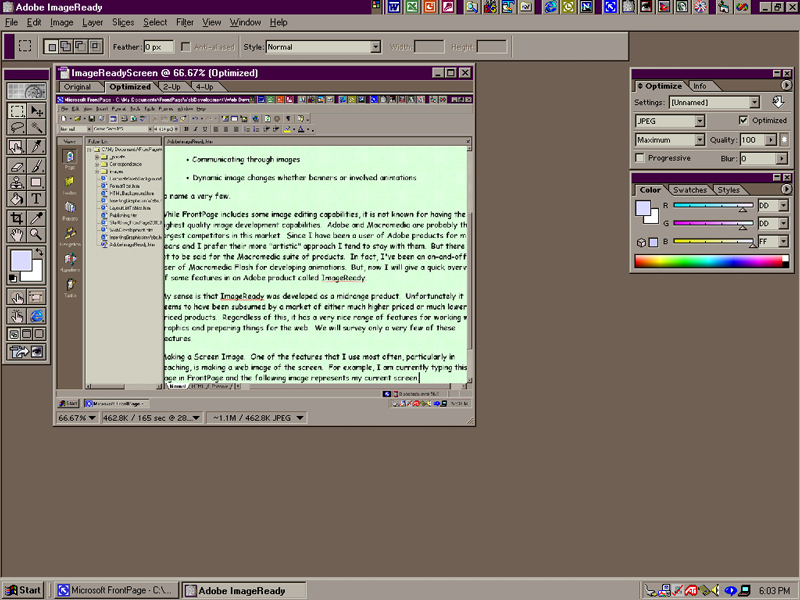
to name a very few. While FrontPage includes some image editing capabilities, it is not known for having the highest quality image development capabilities. Adobe and Macromedia are probably the largest and best competitors in this market. Since I have been a user of Adobe products for many years and I prefer their more "artistic" approach I tend to stay with them. But there is a lot to be said for the Macromedia suite of products. In fact, I've been an on-and-off user of Macromedia Flash for developing animations. But, now I will give a quick overview of some features in an Adobe product called ImageReady. The basic features I am about to survey are something you should find in almost any image processor. My sense is that ImageReady was developed as a midrange product. Unfortunately it seems to have been subsumed by a market of either much higher priced or much lower priced products. Regardless of this, it has a very nice range of features for working with graphics and preparing things for the web. We will survey only a very few of these features. Making a Screen Image. One of the features that I use most often, particularly in teaching, is making a web image of the screen. For example, I am currently typing this page in FrontPage and the following is a reduced image of my current screen. |
The process for doing this is
You should now see something like the following on your screen. |
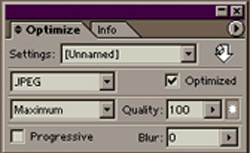
Now in order to "optimize"
the image, which is Adobe jargon for converting the file format to JPG
or GIF, you need to follow these
additional steps.
|
You should see the following. |
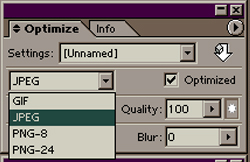
Notice that GIF and
JPEG are the two first
entries. We will not discuss the PNG which are an attempt to get
JPEG quality at GIF resource demand levels. Remember, in general,
JPEGs will be a bit larger, but give you better representation of
subtler color changes for things such as photographs. If you have
more blockish color areas then GIF gives you better representation while
requiring fewer resources.
|
Now you want to
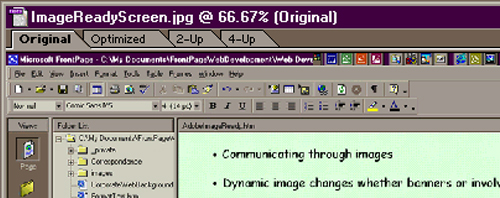
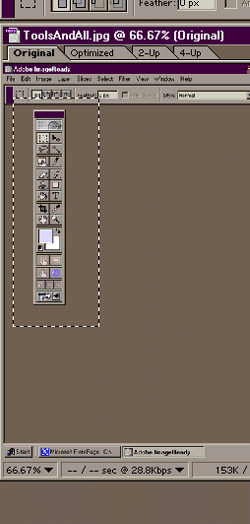
So this completes creating a screen image. Cropping and Resizing an Image. Having done this, you may have noticed that I have definitely cropped certain screen images to focus in on a particular portion of the image. It should also be obvious that I have resized most of the images I have used so far, mainly because they are larger or smaller than they would actually appear on a screen in practice. The tools window looks like the following image. |
 |
||
|
Marquee Tool - used for cropping |
Move | |
|
Eraser |
Paint Brush | |
| Text | ||
There are a very large variety of
tools and I have given names to just a few of them. Some of them
have very familiar icons. In order to make sure you have the tools
you need to
Now we are going to make use of the Crop Tool or Marquee Tool as Adobe calls it. This allows you to crop the image.
This should look something like the following |
Now you want to
This should leave you with the image you've selected. Now if you want to resize it you should
You should get a dialogue window/form that looks like the following. |
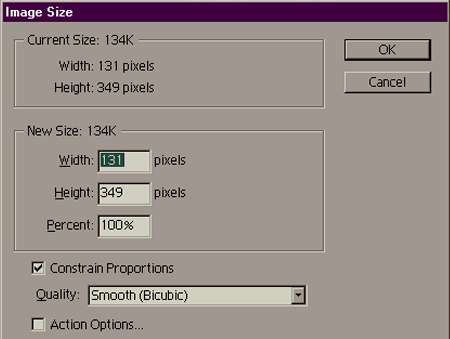
| Now you can adjust the size of the
photo by either changing the Width:
or Height:. You can do this
with the original proportions maintained by leaving the checkbox
checked, or unchecking it. Remember, most screens are 1024 pixels
wide and 768 pixels high. Slightly older representations are 800
by 600. But keep in mind pixel resolutions are increasing
considerably.
Well, there is an awful lot more I could do just in ImageReady, but these basics are something that you are almost surely going to need to do in some image processor. |