Macros and Recording Macros
|
Some Background. It is quite often the case that you have a set of steps you follow when working with a spreadsheet. If you use this set of steps frequently you probably try to get through them as quickly as possible. These sorts of repetitive tasks can get boring very quickly. The purpose of macros is to develop them so that they implement this sequence of steps for you. Developing these macros is made even easier by the ability to automatically record the steps you follow without having to type any Visual Basic code. We will start with recording a macro. After this we will describe some of the important features in the toolbars and dialogue windows associated with macros. Then we will return to recording macros and describing how to improve on their development. Recording a Macro. In order to learn to record a macro we will start by developing one that is very simple. You need to work through the following sequence of steps in a new workbook.
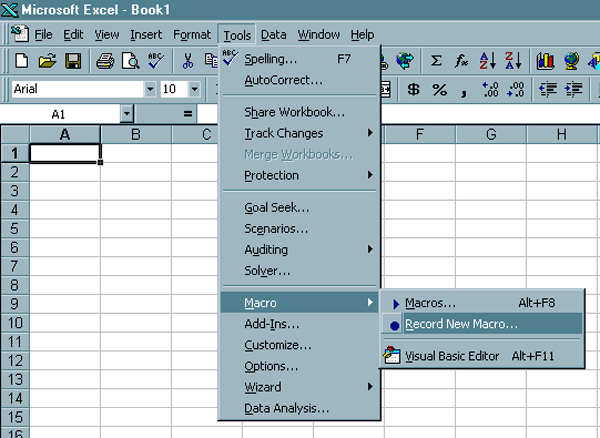
You should see the following sequence of menus appear on your screen. |
| At which point you should get the following dialogue form/window. |
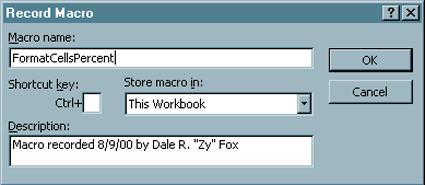
We will say more about the options later in this page
but at present you should
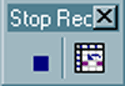
Now you should get the Stop Recording mini-toolbar, someplace on your spreadsheet, which looks like the following. The little blue box on the left stops the recording of the macro when you are finished working through the steps. The cell block icon on the right will cause your macro to make use of relative addresses if it is clicked. |
|

Now you want to type in a couple numbers into the cells to see what they look like. Now the image on your screen should look like the following. |

Cleaning Up the VB Code.
Before we go any further we want to see what was
recorded.
|
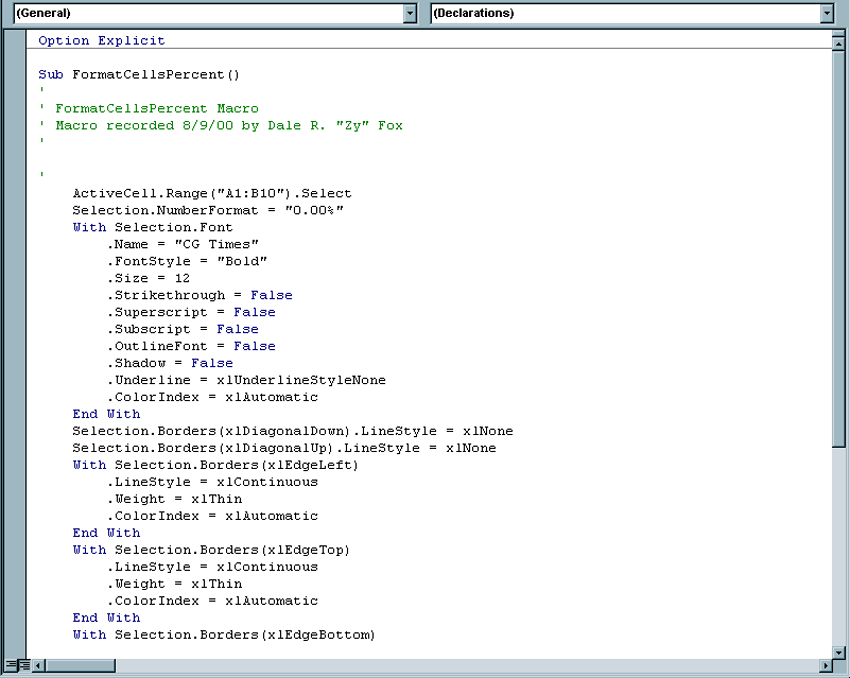
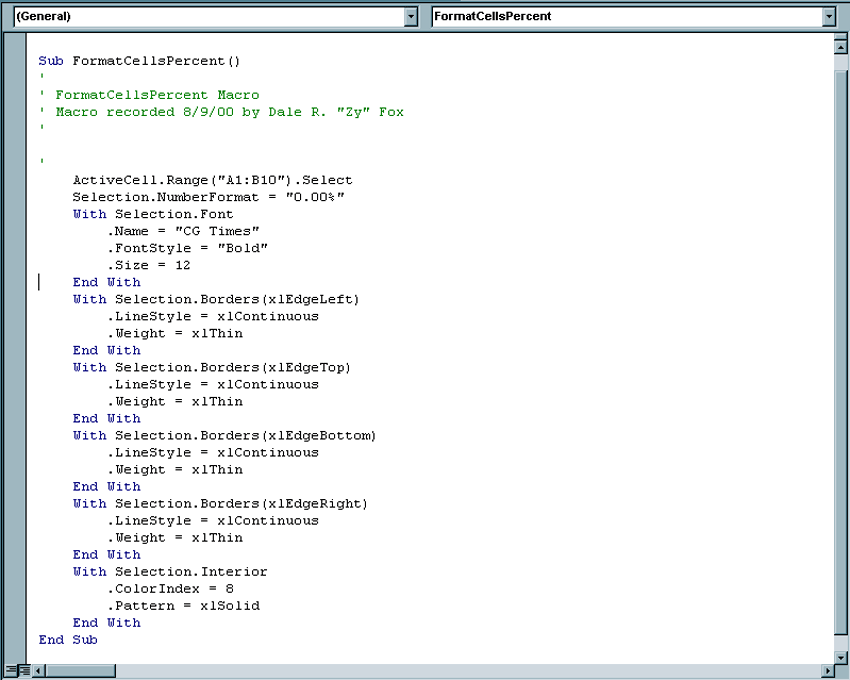
| Notice that there is considerably more Visual Basic code than you would likely anticipate. You need to scroll through it to see all of it. Wouldn't it have been nice to generate VB code so easily in CS 110. Unfortunately, this code can stand to have quite a bit of cleaning done. That is, you could get the same results with considerably less code around. You can delete all of the lines that have to do with automatic colors and things that weren't done to get code that is simplified to the following. |
| While it may be possible to clean up the code even
further, you can see that this is likely to always be an issue.
Just make sure you leave in the things that were actually
changed! We will talk more about the meaning of the code in
class.
Implementing the Macro. There are two major ways to implement any macro.
First we will implement the FormatCellsPercent macro using the menus. Then we will implement a short-cut key to see how much easier this is. You should work through the following sequence of steps.
Now you should see a dialogue form like the following. |

This will format the cells D12 ... E21 since we used relative addressing in the construction of the macro. If we hadn't used the relative addressing it would have reformatted the same cells A1 ... B10. The next thing we want to do is create a short-cut key. To do this you need to follow the same steps as above to get to the FormatCellsPercent macro.
You should get a dialogue form/window like the following. |
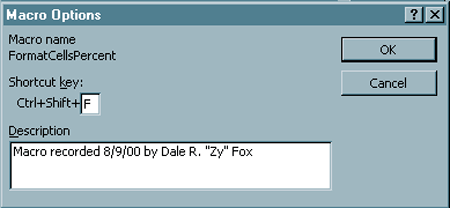
We are going to use Ctrl+Shift+F by pressing all three
keys simultaneously as the shortcut key so
It is also possible to use lower case letters in the key combination by just typing in a lower case letter in the Shortcut key: text box. You always need to make sure you don't use a key combination more than once within a workbook. You also want to make sure you don't use key combinations such as Ctrl+S which already have a purpose. |
| Some Other Options. There are a variety of other
options you can determine when developing macros. You've already
seen how to select a name and shortcut key. You also have the
option of using either relative or absolute addressing within the
macro. If you need to get more sophisticated with the addressing
you need to move to developing a procedure.
You can also store the macro in a variety of locations. By default it is stored in a module within the workbook that is active when it is developed. You can also store it in a new workbook or if you want to have it more easily accessible to all of your workbooks you can store it in your Personal Macro Workbook. You can also include a description of the macro. |