Creating Add-Ins


Creating Add-Ins.  You can convert any workbook or project to an add-in, though this is often not an appropriate thing to do.  There are many advantages to making an add-in out of some of your Excel programs.
  • Your user defined procedures don't appear in the Macros dialog.
  • Add-ins execute somewhat faster than normal files.
  • You can protect your source code so that other users can't view or modify it.

Remember, you want to make sure that you have implemented any shortcut keys or command bars before you finalize the add-in.  Another reasons add-ins can be useful is that any add-in functions are added to the function wizard.

The following steps outline how to convert a VBA project in a workbook into an add-in.

  1. Open the Excel workbook that contains the VBA application you want to convert to an ad-in.
  2. Hide any worksheets that you want to make sure another user can't see.
    1. For each sheet you want to hide click on the Format menu
    2. select the Sheet item
    3. select the Hide item on the submenu.
    4. then use the Tools menu
    5. click on the Protection item
    6. select the Protect Workbook option to password protect the structure.
  3. Open up the VB editor.
  4. Select the VBA Project you want to convert to an add-in in the Project Explorer window.
  5. Choose the Debug menu and the Compile command to compile your VBA project.  Compiling the project just before you convert it to an add-in ensures that all of the code is in a compiled form and that your code will execute faster.
  6. Click on the Tools menu
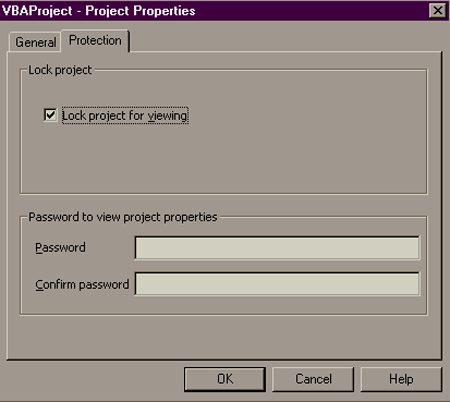
    1. select the <projectname> Properties command to display the following dialog.
    2. click on the Protection tab
    3. select the Lock project for viewing option.
    4. enter a password in the Password textbox.  Your source code will only be editable in the add-in if the user can supply the correct password.
    5. confirm the password by entering it a second time
    6. at this time you could also change many of the other properties of the project after selecting the General tab.
    7. click OK.  Now your project is password protected


  1. Choose the File menu.
  2. Select the Save As item.
  3. Select the Microsoft Excel Add-In (*.xla) file type in the Save As Type drop down list.
  4. Fill in the remaining options as you desire.
  5. Enter a filename and select the folder/directory where you want to save it.
  6. Click Save.

If you follow these steps you will have created an add-in.

Creating an Add-In for the Distribution Expectations.  Now you want to follow the steps outlined above to create an add-in out the functions you developed for the distribution mean, standard deviation and coefficient of variation earlier in the semester.  This would give you something that you could distribute to others that they could then use without writing their own code.

Distributing an Add-In.  You can distribute your add-in by simply copying the *.xla file onto a diskette.  This add-in can be loaded from the diskette or after it has been copied to the hard drive using the procedures outlined in the last webpage.