Some HTML for Developing Web Forms
| Introduction.
We've been using basic HTML to develop ASPs, but now we will need to
develop some HTML expertise for form development. Remember, as
stated previously, the basis of these web based user interactions will be
done through HTML using the <FORM>
</FORM> tag pair.
In general the <FORM> tag makes use of the following syntax <FORM METHOD=______ ACTION="somePage.asp"> where the METHOD can be set to either GET or POST. We will focus on <FORM> tags where <FORM METHOD=POST ACTION="somePage.asp"> since this has several advantages for what we'll be developing. "somePage.asp" is the name of the form processing script page that we defined in the last course page. If we were to use GET as the METHOD, we would be relying on working with QueryStrings. While certainly not insurmountable, they have their disadvantages such as they cannot become longer than 255 characters, for every value you want to get from the user the computer needs to append the variable name and inputted value to the QueryString, and the QueryString shows up in the URL for the form processing script. Rather than try to talk about all of these issues in detail, we will just focus on using POST as the METHOD. The Basic <FORM> Input Controls. In HTML there are five main types of input controls. Notice the terminology is very similar to Visual Basic terminology. While we will definitely present a more involved discussion and develop a variety of examples, the controls are summarized in the following table. |
| Control Type |
Syntax |
Description |
| Text box |
<INPUT TYPE=TEXT NAME=____> |
Use when you want the user to enter a string of characters or a number. |
| List box | <SELECT NAME=____
> <OPTION VALUE=" "> <OPTION VALUE=" "> ... <OPTION VALUE=" "> </SELECT> |
Use when you want to restrict the user to selecting an item in a set of acceptable answers. Each option in the List box is determined by the <OPTION> tag. You can also influence how many elements appear on the form before the user selects the control. Even though there may be ten items in the list, it can appear either as a combo box or a list box with all ten items showing. |
| Check box | <INPUT TYPE=CHECKBOX NAME=____ > | Use anytime you have one or more binary options that can be mixed and matched. If they are in a related group presume that more than one can still be checked. You can set up a default value with a CHECKED entry at the end in the tag.. |
| Radio buttons | <INPUT TYPE=RADIO NAME=____ VALUE=____ > | Use when you have a set of options that are mutually exclusive. That is, only none or one of the options can be selected. All radio buttons with the same NAME are in the grouping. The VALUE is used to identify each button in the group. |
| Submit button | <INPUT TYPE=SUBMIT> | This puts a command button on the form that the user should press to submit the form for processing. This will send the information gathered from the user to somePage.asp. |
| A Relatively Contrived Example.
Before moving on to our Login.asp we will now develop a simple form ASP
that makes use of all of the above controls so that you can see these
features implemented. We still need to cover the Request
class/object in order to implement our Login.asp.
Let's assume you have set up a server to provide web space. To keep it as simple as reasonable lets assume that when someone submits information you want to get the following
What this will require is summarized in the following list.
First you need to create a file called YouDidIt.asp containing the following HTML code. You should save it to an appropriate location.
So you should create the CaveatEmptor.asp text file with the following code and save it in the same directory as the YouDidIt.asp. Make sure that there is no unwanted word wrap on any of the lines.
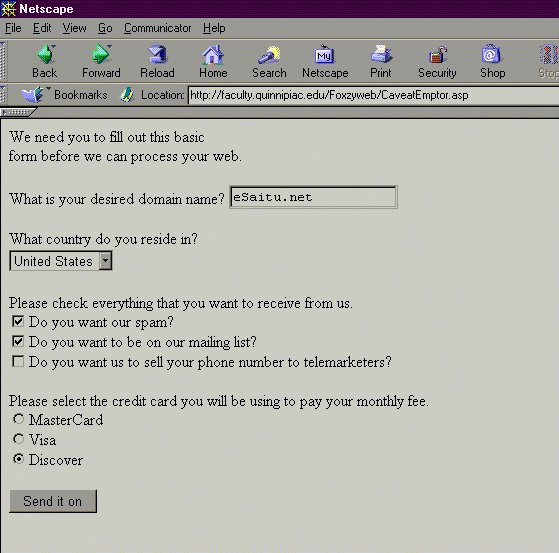
We will discuss the code in class. Now you should upload both the files to your root web. Then you should implement the CaveatEmptor.asp by entering its URL. You should get something like the following image after you've inputted values. |

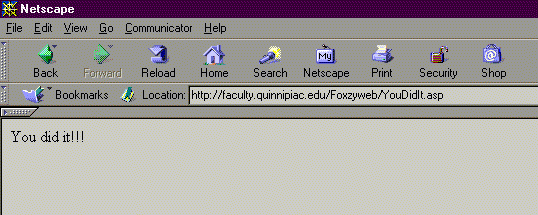
| Fill in the form as desired and then submit it. You should then get the following form processing script page on your browser, though you didn't really do any processing of the inputs. |

| Now you can see at least the initial aspects of
developing a form. If you want you should play with the HTML to
modify the form to do some other things.
The next web page will focus on how to work with the inputs the user entered. |