Dealing with Pre-specified Options
| Some Background.
Unfortunately, it is not possible for me to really know what your
background is in something like Access. Now that I am into the
semester I realize I should do a small supplement. When you have a set of pre-specified selections that you want a user to select from there are a number of good approaches. Two of the most commonly used are
Now we will illustrate each of these using an example. Consider a situation where you want a customer to choose which credit card they will use for payment. You are able to accept
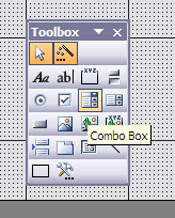
You do not want the user of the form to make entry errors or fill in something you cannot accept. There are two major ways to deal with this sort of situation. Drop Down/Combo Box. While we could also use a list box, it is much more common to use a drop down box. They take up less space on a form, is likely the biggest reason they are used much more often than list boxes. I want to lead you through some of the steps for creating a drop down box. Assume you have a database called store.mdb with a table called payments. You want to create a drop down box for the payment method. You need to make sure you have a field for payment_type in your payments table. Now when you use the wizard to create a form for the payments table it will first put in a textbox, which you should delete in order to do something better. In design view for the form you should click on the option for drop down or combo box. This is shown in the image below. |

| Now you want to trace out the combo or drop down box on your form in design view. This will cause a wizard to activate for how you want to work with it. The first step asks you how you want to fill in the values for the drop down box. |
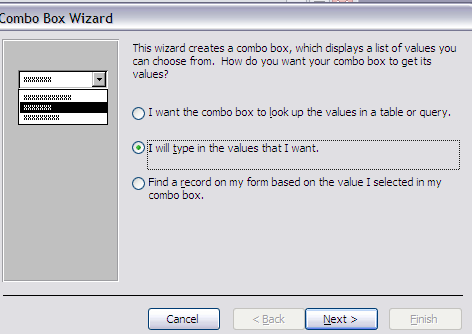
| You should select the option for typing in the
values yourself until we get more advanced. Though, you can
use these other options if you already know how. Then click on Next. This will give you the form to fill in the values you want. |
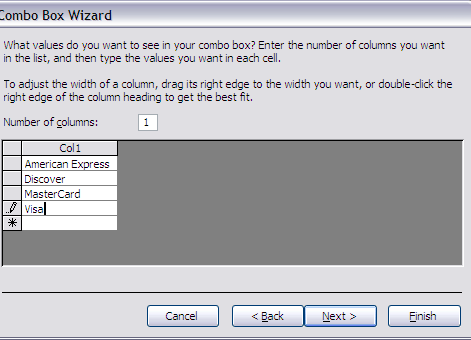
| Once you have typed in these values you should
click on Next. This will give you the next step in the wizard with the following form. |
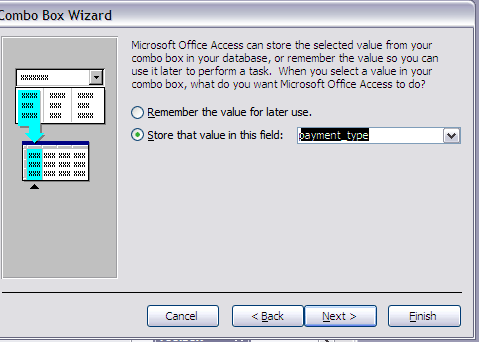
| So you choose to store the results of the user's
selection in this drop down box in the field you created for it
called payment_type. Then click Next to name your drop down.
I'm leaving out this form. Finally, when you use this control on the form it should look like the following. |
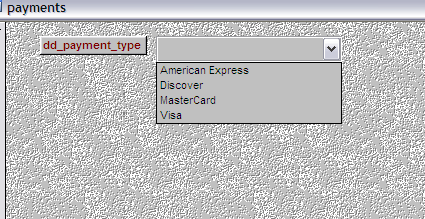
| This is one of the main approaches that can be
used. Option Group. One of the other main approaches that can be used is an Option Group. Its location in the toolbox is illustrated in the following image. |
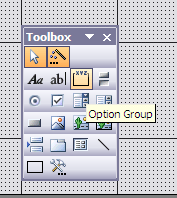
| As usual, you trace out an option group which invokes a wizard. The first form in the wizard looks like the following. |
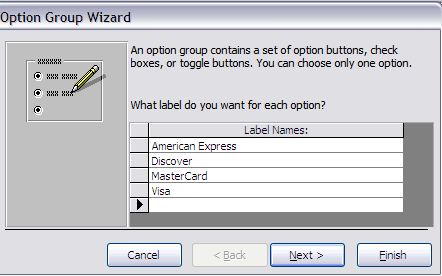
| Once these are typed in you can click on Next. This will take you to a form that asks you about how you want to code what the user selects into the database table. Choosing consecutive numbers is entirely typical. This is about the only unfortunate aspect of this Option Group approach since it will not let you choose text. |
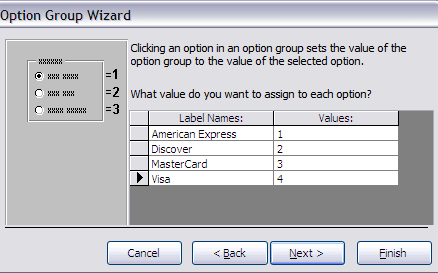
| Once you have typed in the label names, which you
can modify on the form, you should click on Next. This gives
you forms in the wizard that ask you whether you want to configure a
default value. I chose not to.
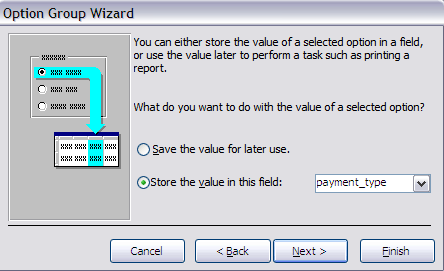
Then you get another page of the form that asks you about the look. I chose whatever was already selected, though you should not. Then they ask you where you would like to store the results of the user's selection. This form is more important. Again, I have them store it in the field payment_type. |
| Then you need to select a name for the option
group, which I am leaving out of my series of images since it is a
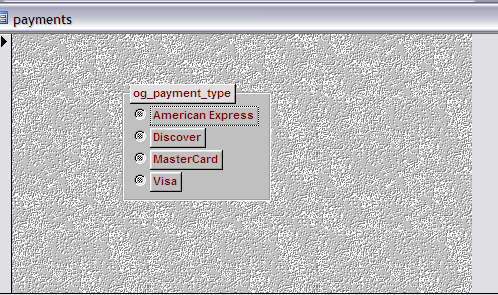
more obvious step. Finally, when the option group as I configured it appears on a form it will look like the following. |
